


Github Pages with Next JS
Learn how to get up and running with your first GitHub Pages website using Next.js . A quick and easy way for creating & publishing a free portfolio, blog or website. By the end of the blog, you will have your own domain and a public place without any hosting cost to post your work.
We will be using Next.js which is an open-source React front-end framework which supports "static-site generation". It exports our react app to static HTML which can be run standalone without the need of a Node.js server & moreover, this can be processed by GitHub Pages.
Github Setup
Step 1 - Create a GitHub account
If you don’t have a GitHub account, create one, otherwise go log in.
Note: Your username will eventually be part of your websites URL, so just keep that in mind when picking a username.
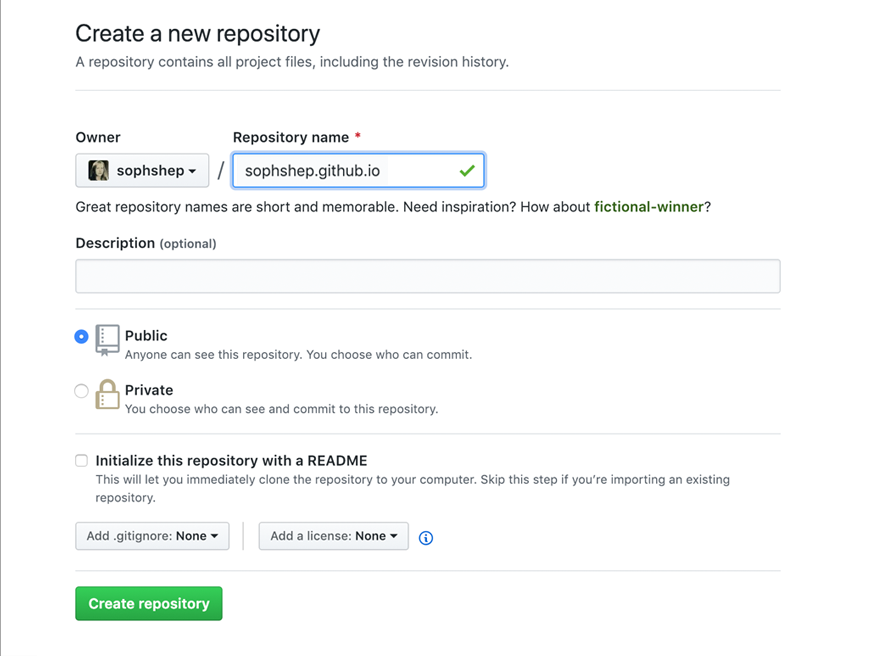
Step 2 - Create a public repo named username.github.io
Like, if my username is "abhishekasana" then my repo name will be "abhishekasana.github.io".
App Setup
Step 3 - Create Next.js app using a boilerplate
Useful Links - [How to push a project to github]
npx create-next-app --example with-static-export username.github.io
git add -a
git commit -m "added my next js project"
git remote add origin https://github.com/username/username.github.io.git
git push -u -f origin main
Modding app for github pages
Step 4 - Update the "package.json". Add the following scripts
Explanation -
Step 6 - Commit & Push these changes
"scripts": {
        //...other_scripts
        "nojekyll": "touch docs/.nojekyll",
        "export": "next build && next export -o docs",
        "fullexport": "npx export && npx nojekyll"
}- By default, Next.js spits the static export in the "out/" directory. But Github Pages site can be only built from either root i.e "/" or "docs/" directory which we will see later in the repo settings in Github. So we will updating the export script to output in the "docs/" directory.
- By default Github Pages do a Jekyll processing on the site. Jekyll considers files or directories that start with underscores as special resources and does not copy them to the final site. And, Next.js uses "_" underscore in the export files/directories naming convention. So we need to disable this Jekyll processing by creating a ".nojekyll" file in the directory which is set as the source in Github pages.
Step 6 - Commit & Push these changes
git add .
git commit -m "script changes"
git push -u -f origin main
Configuring Github pages through dashboard
Step 7 - Update the following params in the GitHub page Settings,
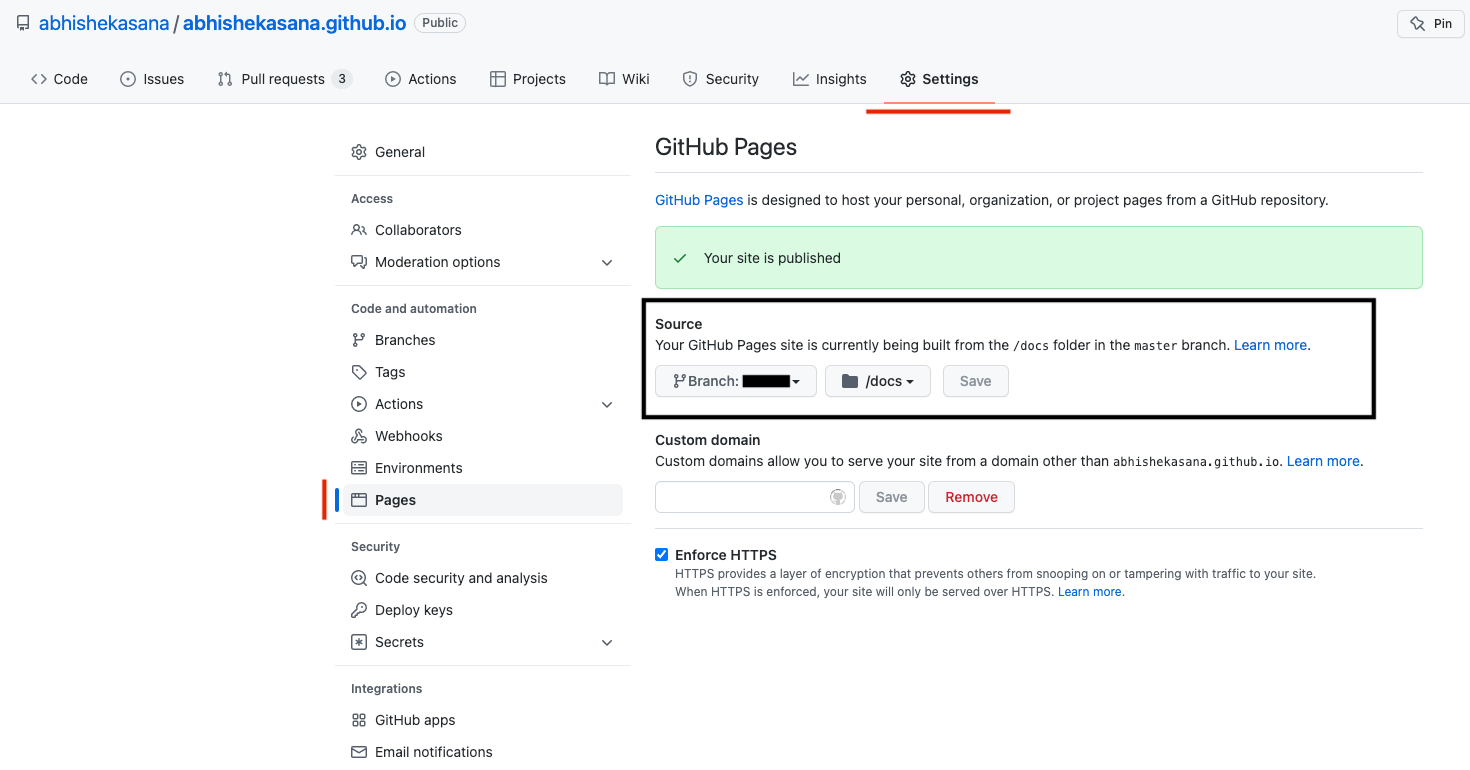
- Map your branch as "main"
- Map your source folder as "docs/"
All Done!
Step 8 - Open your website url (https://username.github.io) in the browser.
There may be a few minute delay, but eventually GitHub will recognize that you created a GitHub Pages repository, it will automatically pick it up and create your website.